Illustrators often need to place characters in scenes to tell stories. Sometimes it’s hard to get the ideas out of your head and onto paper in the early stages.
On my YouTube channel someone asked if there was a perspective app for the iPad, for buildings, houses, etc. Since 3D modeling programs can be complicated and intimidating, I was looking for the simplest solution that wouldn’t take too long to learn. I’d always used SketchUp for this, but the iPad app is pricey. I wondered if there was a free app that was similar.
After some research my recommendation is FormIt from Autodesk. (They’re not sponsoring this, it’s just my impartial review.) Yes, it’s free so it won’t cost you any money to see if you like it. (I have a video on my YouTube channel if you want to see how FormIt works.)
I think Autodesk is really smart in offering it for free. It provides so many features, but if you feel you need some of the more advanced features it ties seamlessly into the paid versions of their products and workflows.
Setting the Scene
FormIt was designed for architects but how useful is it for illustrators and artists?
As an illustrator one of the challenges is setting the scene. Before computers you had to have a pretty solid mental grasp of perspective in the early layout phase. Andrew Loomis shows how this is done in his book Creative Illustration. It’s a great skill to develop, but if you need to add elements or characters you’ll most likely need to redraw the perspective guidelines, which means starting over.
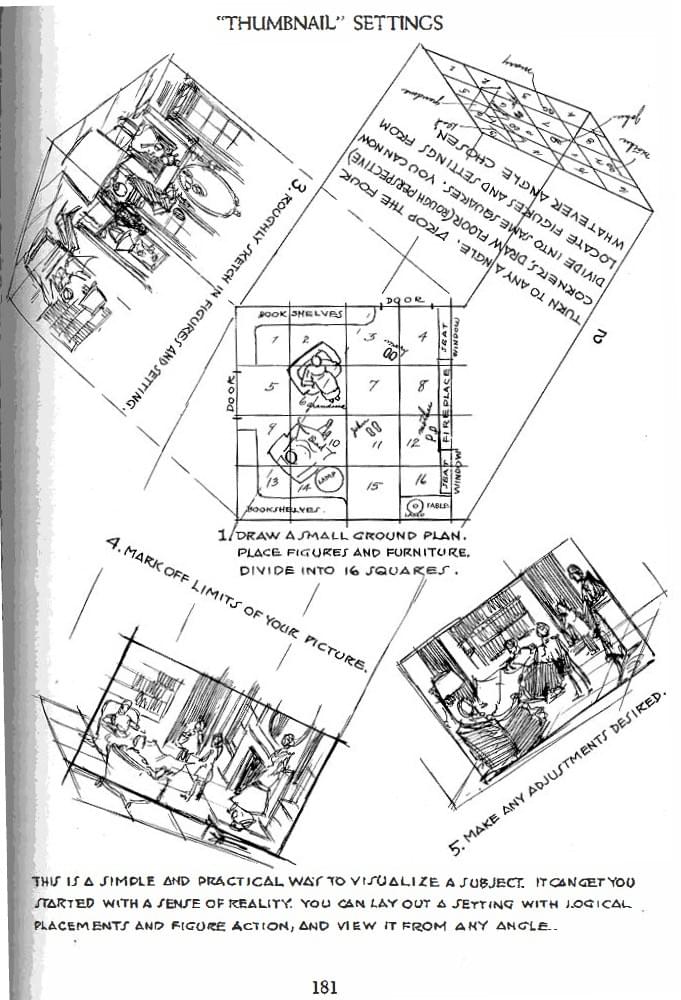
FormIt is helpful in the early stages when you’re exploring your scene with large forms in perspective, and seeing them from different view directions.
I’ve spent the past few weeks doing a deep dive, seeing if it’s really as useful as I thought. And I have to say it’s so amazing and filled with potential for my future projects. As a test I roughed out four city blocks in the Bowery neighborhood in Manhattan.
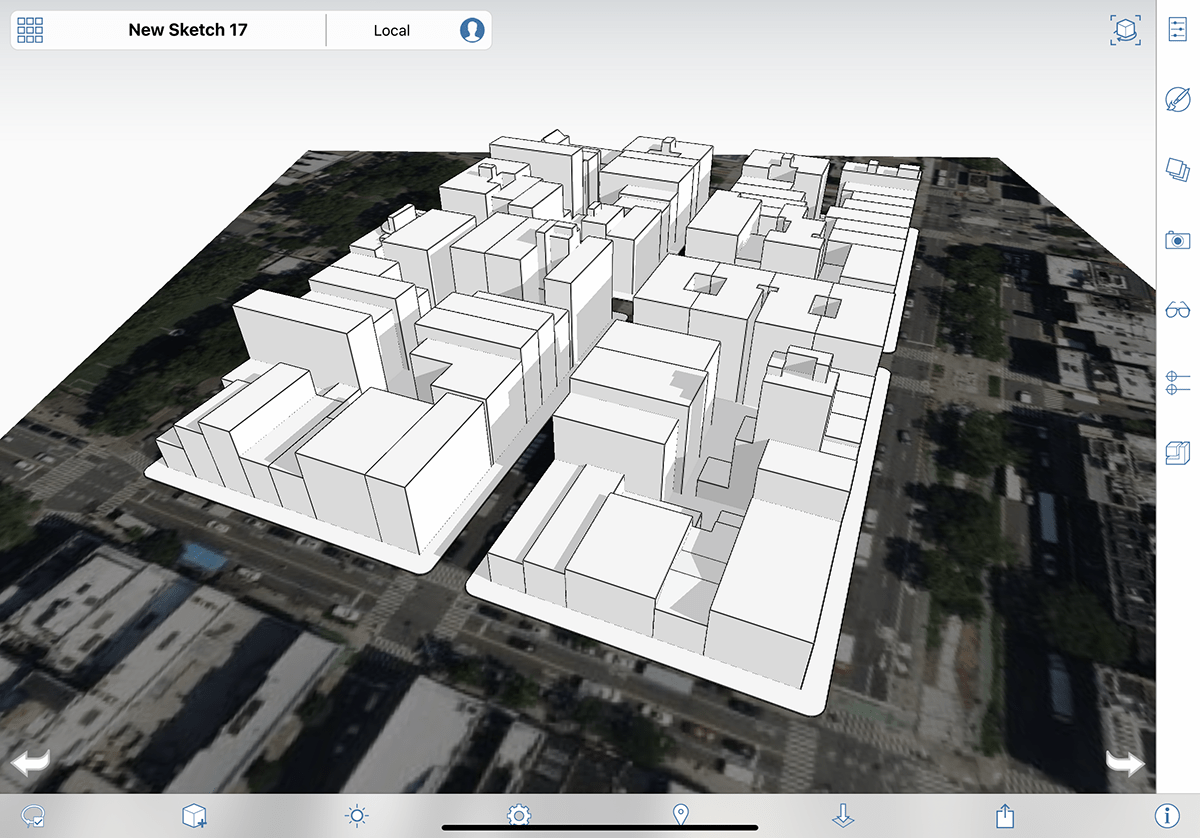
I watched a lot of videos on YouTube. As helpful as they were however I still found myself struggling with the simplest things.
This post is intended to point out some things that will make your learning go faster. These are the tools and best practices that should help you avoid many hours of frustration. Here are a few things that will bring you up to speed and get you started with confidence.
Most Helpful Basics
First, when you open a new document you can touch the screen and rotate the view around. This is the default when nothing is selected.
Interface

Along the bottom is a row of icons. Near the left is a cube with a plus sign. This lets you choose what type of object you want to create (lines, shapes, primitives).
You’ll also see icons running down down the right side. These are panels that let you change things about the objects you create (attributes, layers, styles, etc).
Drawing a Simple Line
FormIt for mobile doesn’t work like other 2D illustration programs where you take the pen tool and click-click-click and all the points connect like dot-to-dots.
For example when you select the Line tool and touch the screen where you want the line to start, one of three things will happen.
- If your touch is too short—a tap—where you touch and let go, nothing happens. This was my first instinct, like a single click with a mouse, but it just deselects the line tool and you have to start again.
- On the other hand, if you touch and hold your finger down too long a Context Menu appears with some icons, but still no point. You have to touch the screen somewhere to make the Context Menu go away and you’re back where you started.
- The trick is you have to touch the screen and immediately move your finger slightly. This tells FormIt where you want to place the first point. In this case it says “On Work Plane,” usually the ground plane. It’s like Goldilocks—not too short, not too long, just touch and move slightly. It takes a little getting used to.
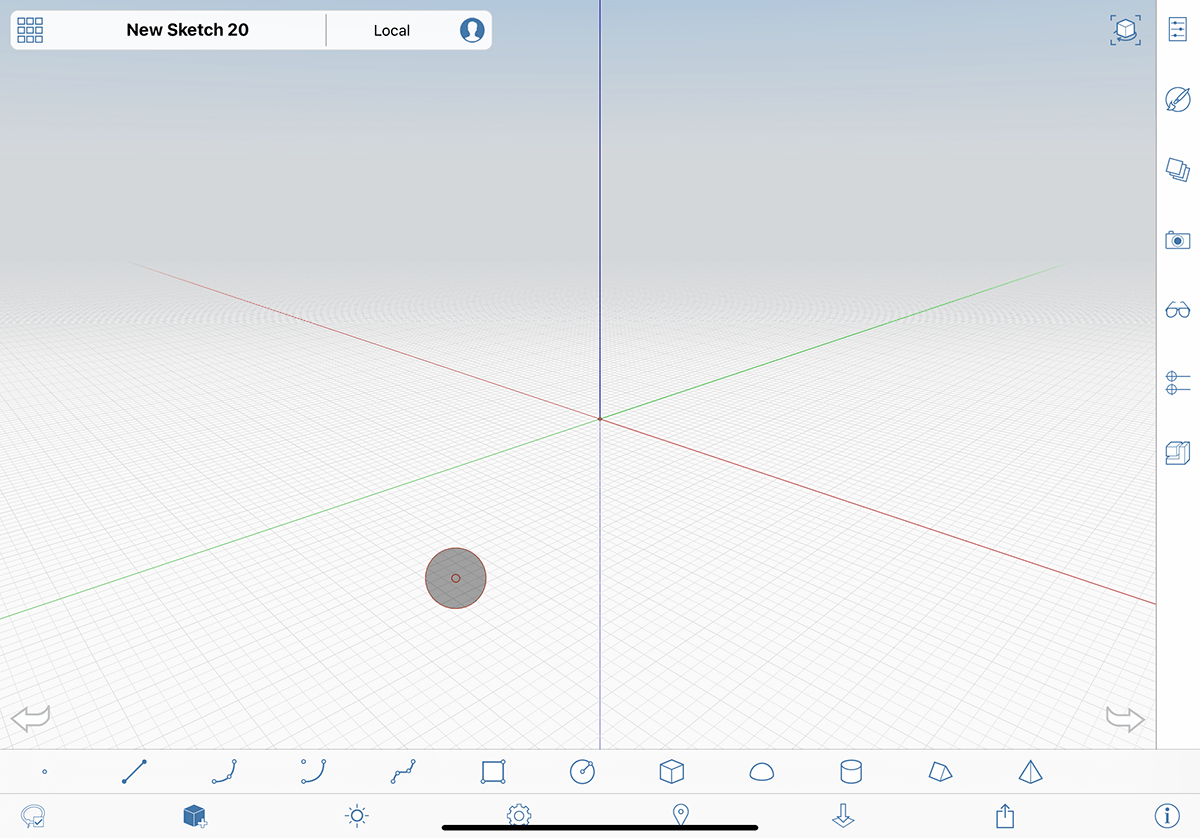
Now you’ll see a grey circle about the size of your fingertip with a small red circle in the middle. This is the first point of the line. Touch and drag to where you want the next point to be. You’ll see the grey fingertip circle and small red circle move with your finger, and you’ll also see a dimension box appear showing the distance between them.
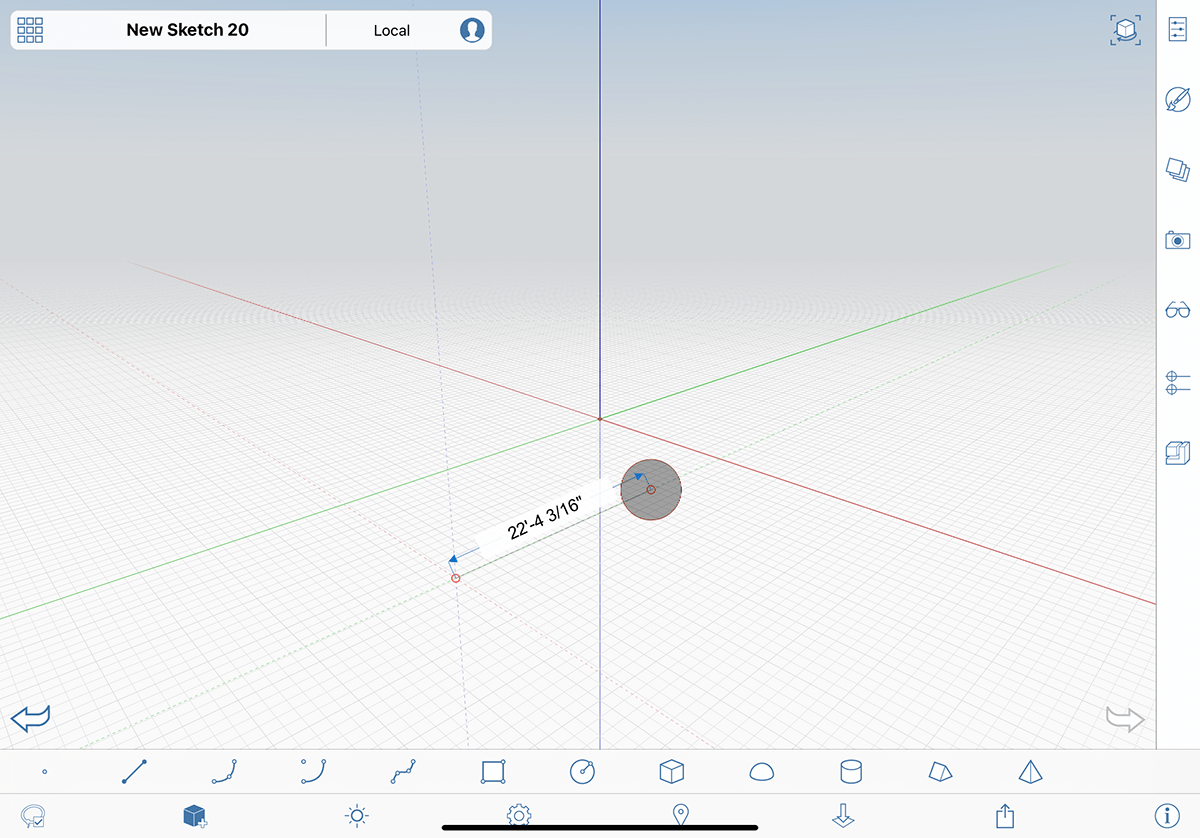
You can tap the screen somewhere if that’s the end of the line you want, or you can keep repeating the touch-drag to place more points. I recommend you practice this until you can easily create a rectangle. You’ll know it’s a closed rectangle because it turns white.
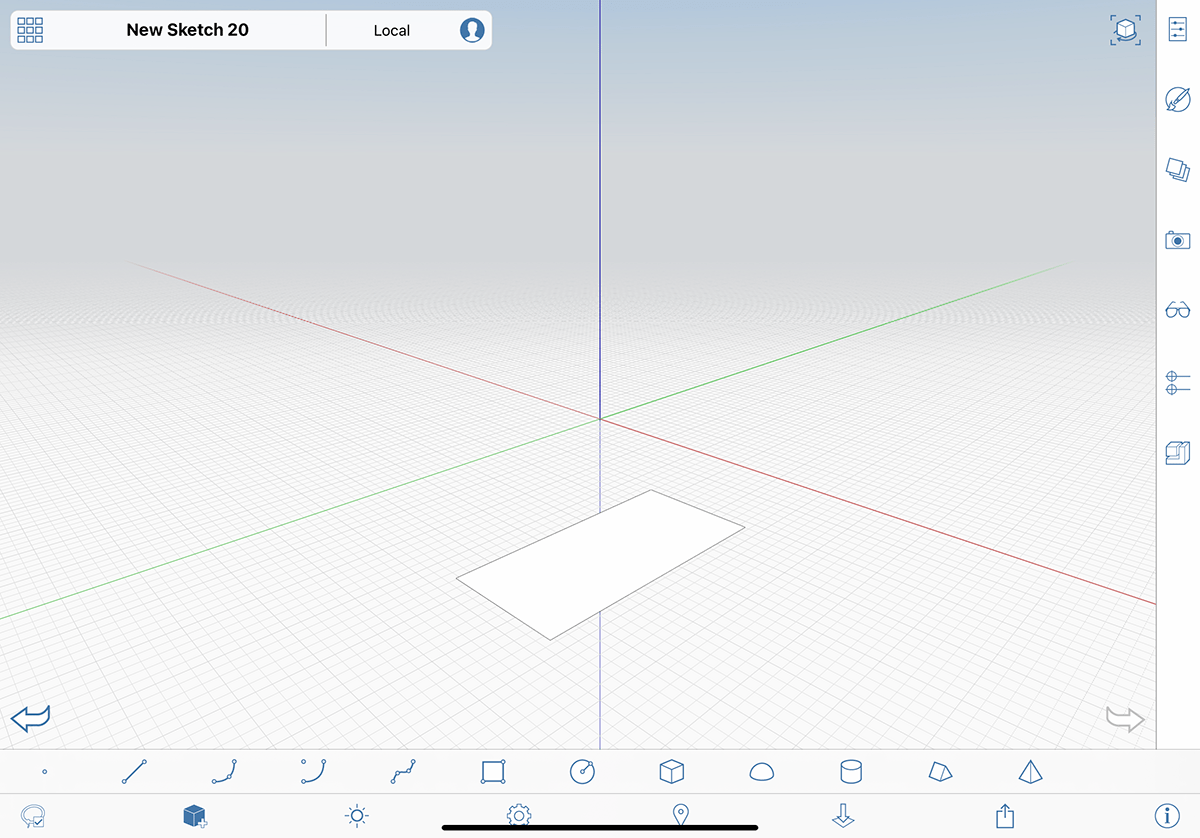
To get the most out of FormIt you need to be able to select and deselect things with confidence.
With this rectangle you’ve just made, you can touch inside the white area and notice it turns a light blue. This lets you know the face of the rectangle is selected.
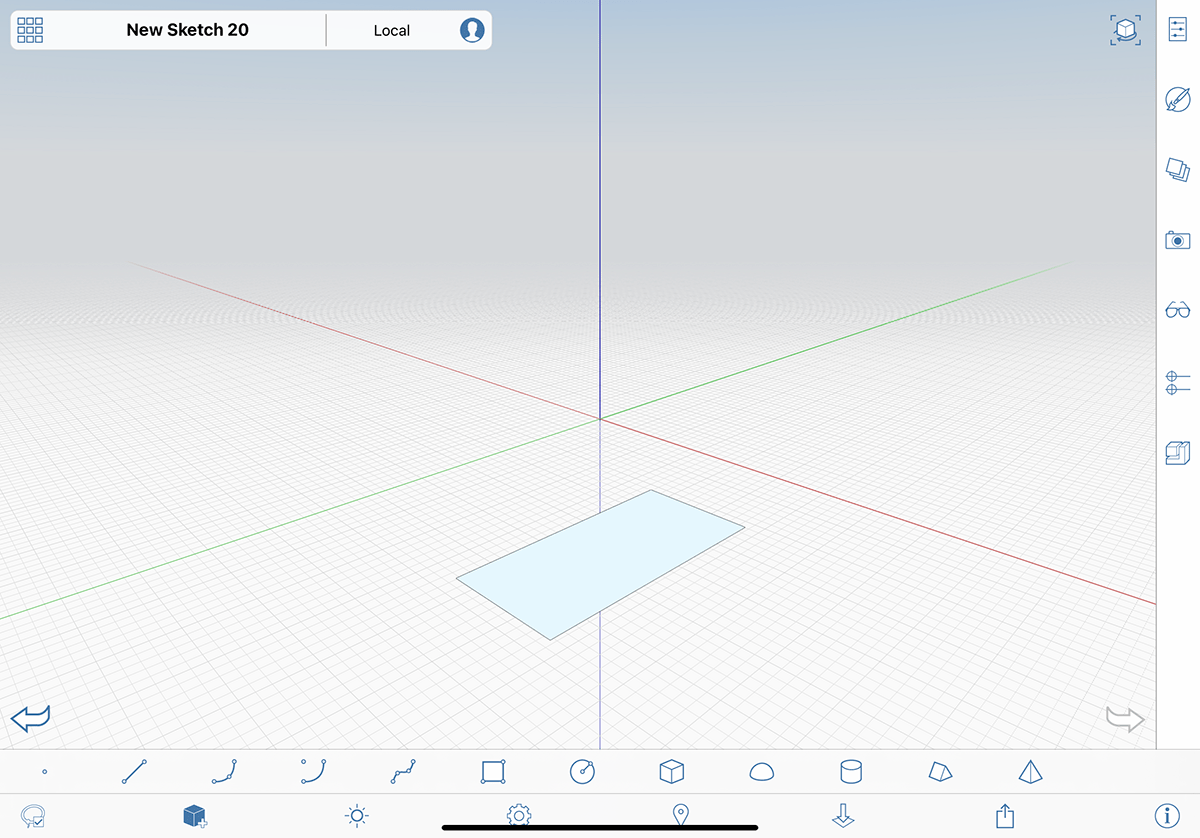
However, the face and the edges can be manipulated separately. The face is one object, and each of the lines is an object. So this rectangle is made up of five objects.
Selecting Multiple Objects—Or Not
Something that will confuse you is that you can inadvertently have multiple objects selected when you thought you only had one.
For example, this rectangle you created with the line tool. In 2-D vector programs, using a mouse, the default behavior is every time you click on an object it automatically deselects anything that was already selected, so you always know just one thing is selected. If you want to select more than one object you have to hold down a modifier key—the shift-key—and then what you click on next will be added to the previous selection.
But FormIt on a mobile device doesn’t have a modifier key. So the default is it acts like a modifier key is ALWAYS held down. This means that if you touch an object to select it, the next object you touch will be added to the selection. And if you touch any additional objects, each one will be added to the selection.
So why am I spending so much time on this seemingly simple thing? Because I can’t tell you how many hours I spent messing things up because I thought I was selecting just one object, not realizing that something else out of my view was also selected and I was actually adding to my selection and my changes were affecting things inexplicably. Things would mysteriously move and scale and I had to delete everything and start over.
Selection Best Practices
The best advice I can give a beginner is to ALWAYS touch the screen in an open area after you create or modify an object. This will deselect anything that might be selected somewhere out of view.
Now that you know nothing is selected, you can click on and modify an object with confidence. If you want to modify multiple objects you have to individually touch each one. This way you can be confident that you’re only working on the object(s) you mean to.
Back to the rectangle shape you created. How do you select the whole thing—the face and all the edges—quickly? For shapes and primitives, just tap it twice with your finger. Now the face and edges are all selected. (Groups are different, see below.) With the whole object selected you can move it or perform other modifications.
Change the Rectangle Into a Cube
First, make sure nothing is selected. Touch the face of the rectangle to select it. Now if you pull your finger upwards along the Z axis you’ll extrude the rectangle into a 3-dimensional cube.

Undo/Redo
If you move something somewhere you don’t want, touch on the undo arrow in the lower left corner. The Redo arrow in the lower right corner will bring it back.
Delete an Object
The next thing you’ll want to know is how to get rid of these first practice objects. I looked all over everywhere for a little trashcan or something and couldn’t find it. Remember how if you touch an object and hold your finger down too long a Context Menu appears? At the top you’ll see an X. Click that to delete whatever is selected.
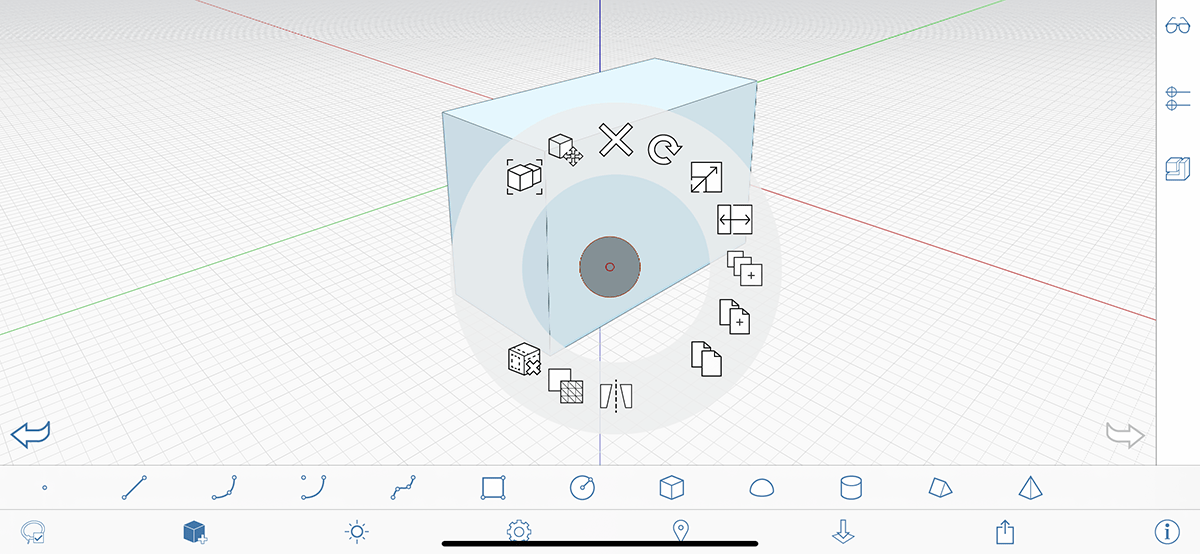
If you’re on the desktop or laptop and are using the web version you’ll see some text appearing when you hover over each icon to tell you their name. On the mobile version there aren’t any hover-text names and it isn’t always obvious what the tools actually do. And it might be confusing since the Context Menu changes depending on the type of object is selected. I made a free PDF showing all the icons and explanations of what they do, you can download it here: FormIt Context Menus for Mobile Devices
Rectangle
Now you know how to use the Line tool, try the Rectangle tool. Touch the screen and move your finger slightly to set it on the work plane. Then drag out one of the edge dimensions and let go. Try clicking on the dimension text and entering an exact number. Now drag out the second dimension. You’ll see the white rectangle, which you can select and drag up into a cube.
Primitives
Try placing one of the Primitive shapes. After you place them you can select one of their faces and drag to resize.
Offset Edges
One of the tools you’ll find helpful is the Offset Edges tool. To see how it works place a rectangle in your scene. Click on the face to highlight it, then touch and hold to bring up the Context Menu. Choose the Offset Edges tool, then drag one of the edges and you’ll see some dimension text that you can edit. This creates another rectangle inside—or outside—the original rectangle. You can pull up that new shape and it will create a wall.
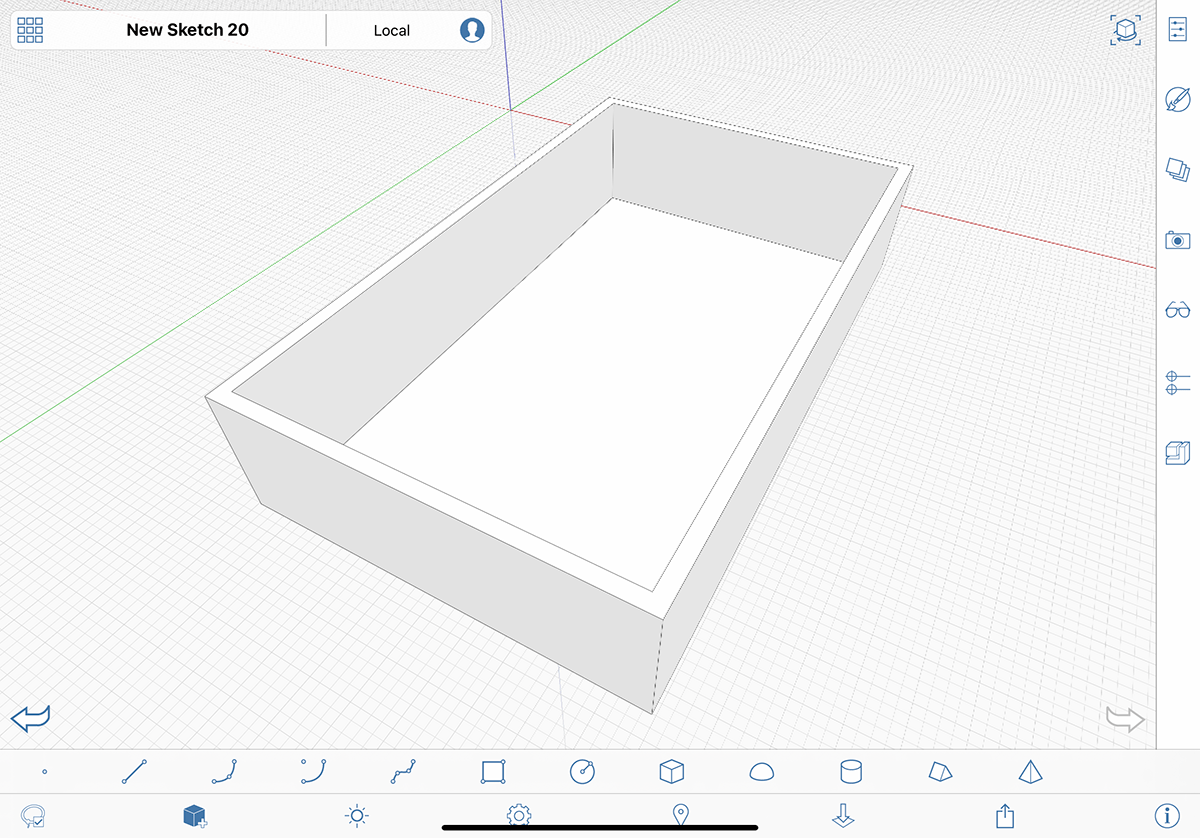
The Offset Edges tools is also available for lines and faces.
Doors and Windows
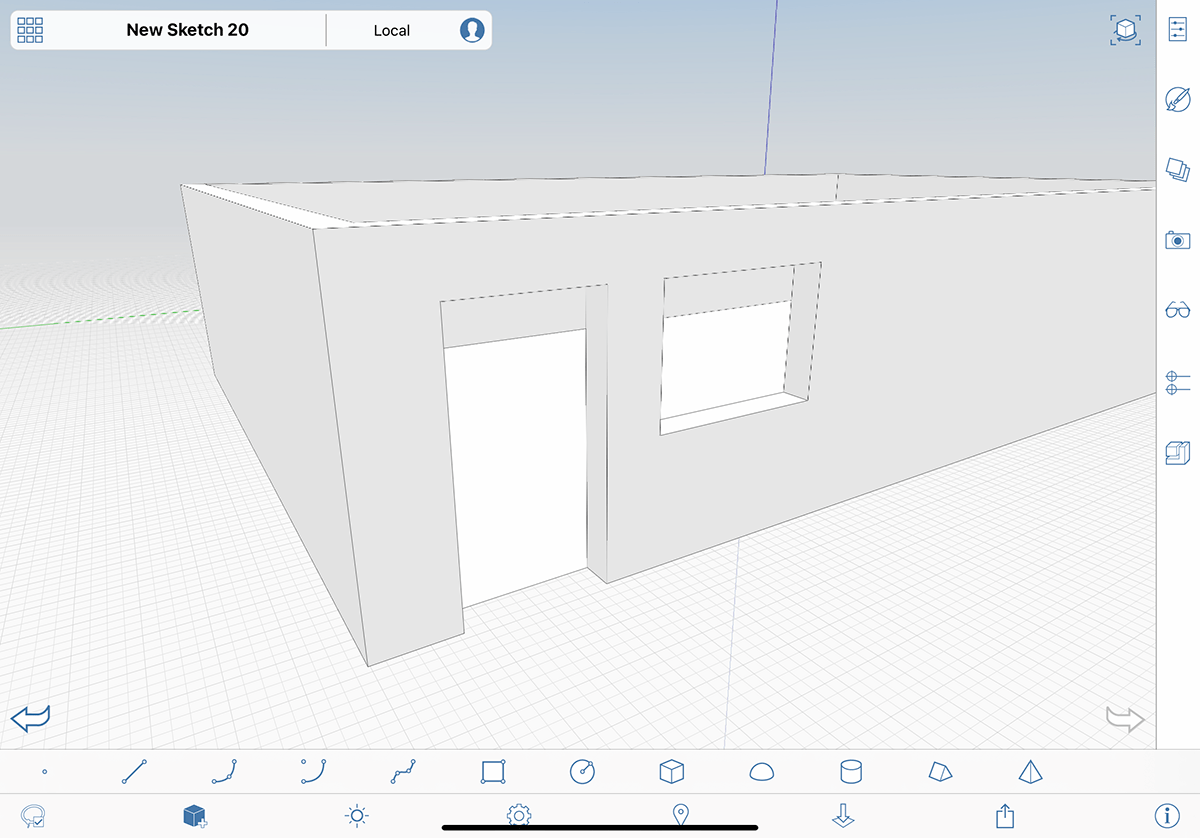
Now that you have a wall you can place a rectangle on it for a door. When you select the new rectangle face you can push it and it will punch a hole in the wall.
Try placing another rectangle for a window and pushing it through to make the hole.
Arrays
Sometimes you might want a wall with several windows, all with the same dimensions. You’ll use the Array tool for this. Place one window where you want the first one. When you bring up the Array tool choose Linear and type in 3 or 4, depending on how much space you have on your wall. Now when you touch and drag you’ll see multiple copies of the windows appear. Drag until they’re where you want them.

Import Satellite Imagery
Sometimes the scene you want to draw is from a real-world location. You can choose the Location tool from the bottom of your screen to imp ort a satellite image of a site plan. Now all your rectangles and shapes will be at the same size.

You might find it helpful to view the location using Google’s Street View and taking some screen shots to help you with your vertical dimensions. Personally I don’t get too caught up with the exact dimensions since I use this as part of my early blocking-in process. Of course, if you know the exact dimensions, by all means use them.

Set Axes
The satellite images are brought in oriented to North and South.
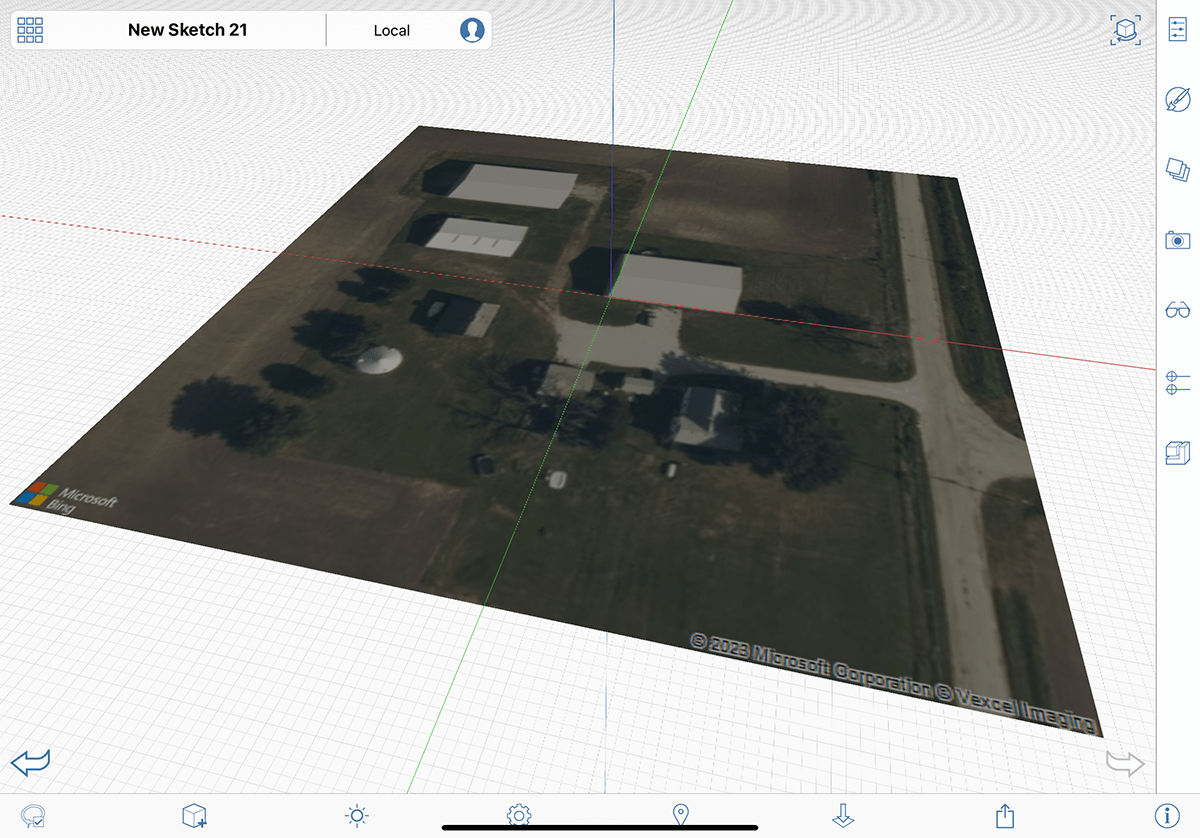
But sometimes the streets are at an angle. If you try to draw your rectangles and rotate them, and resize them... it will be frustrating and you’ll never get things lined up right.
Thankfully you can use the Set Axes tool and line the X and Y axes up to streets in the satellite image. Now all your shapes will align to the new grid. You can set the axes as many times as you need to.
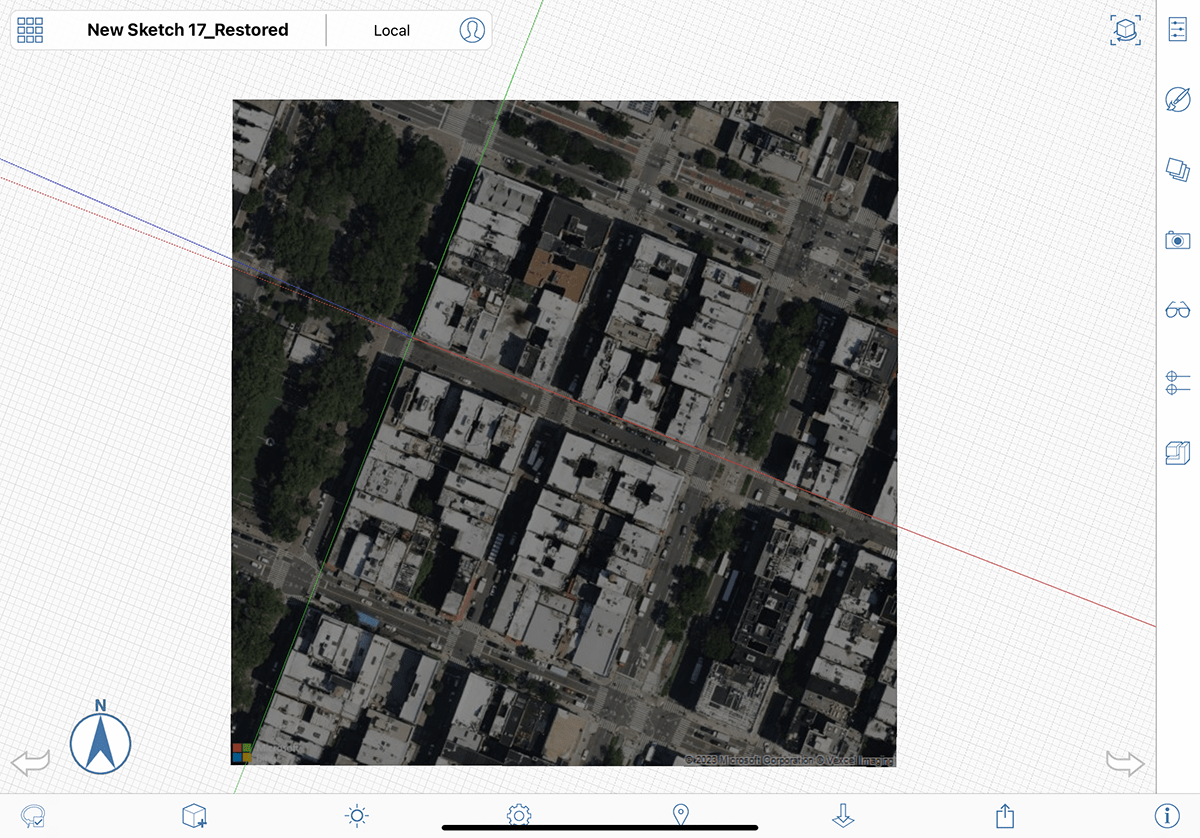
To set the axes back to the default, choose the Reset Axes tool.
Shadow Tools
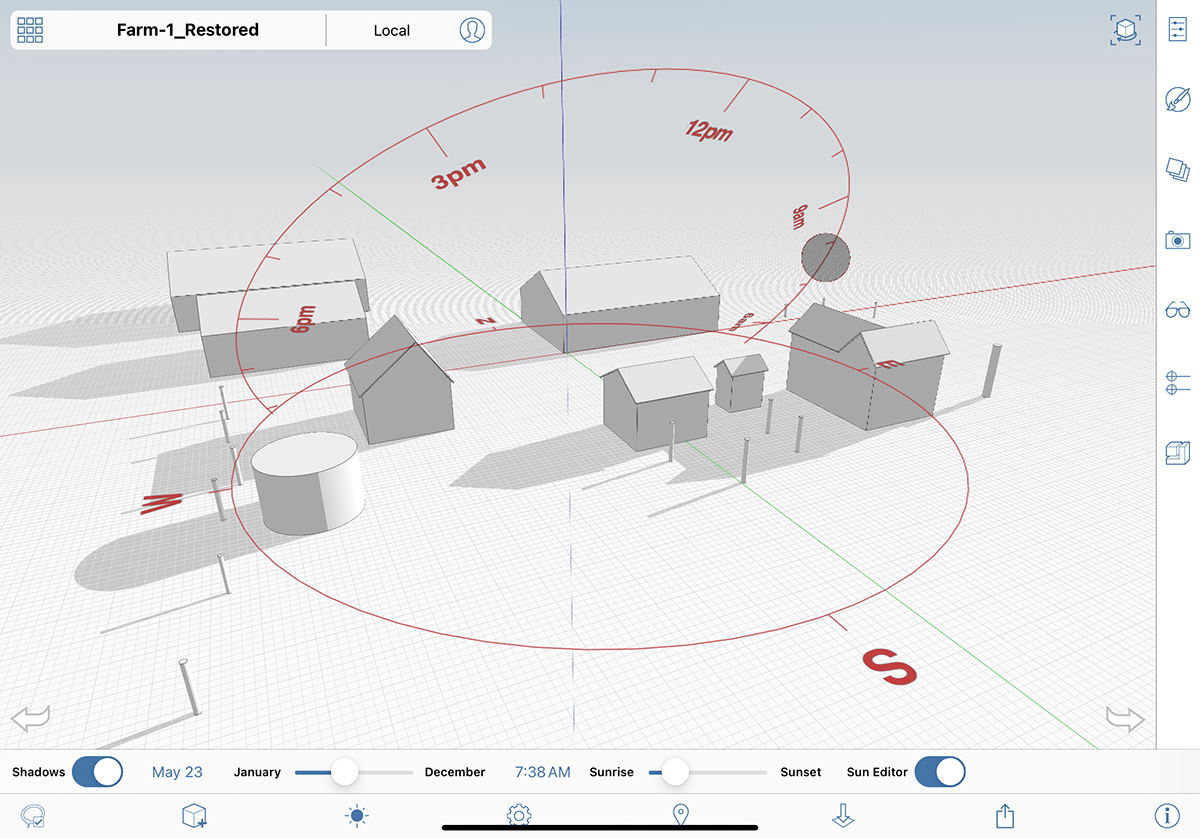
After you’ve placed a few primitive shapes in your scene, use the Sun and Shadows tool (the little sun icon at the bottom of the screen). Turn the Shadows button on and experiment with the Month and Sunrise/Sunset sliders. Turn on the Sun Editor to see the path the sun makes across the sky at the different times of the year.
There are a lot of other tools and features to explore, but these should get you started. Lastly I want to share what I’ve found are some best practices that will get you modeling quickly and with confidence.
Best Practices
Groups
To understand how important groups are, do this little exercise. Make a rectangle and extrude it up into a cube, then deselect it. Let’s say that’s a building, and now you want another building next to it. Make another rectangle next to the first—you’ll notice that it wants to stick to the corner of the first building. After you pull this new rectangle up into a cube and let go, you’ll notice that these two buildings have joined together and you can no longer manipulate them individually. What a nightmare!
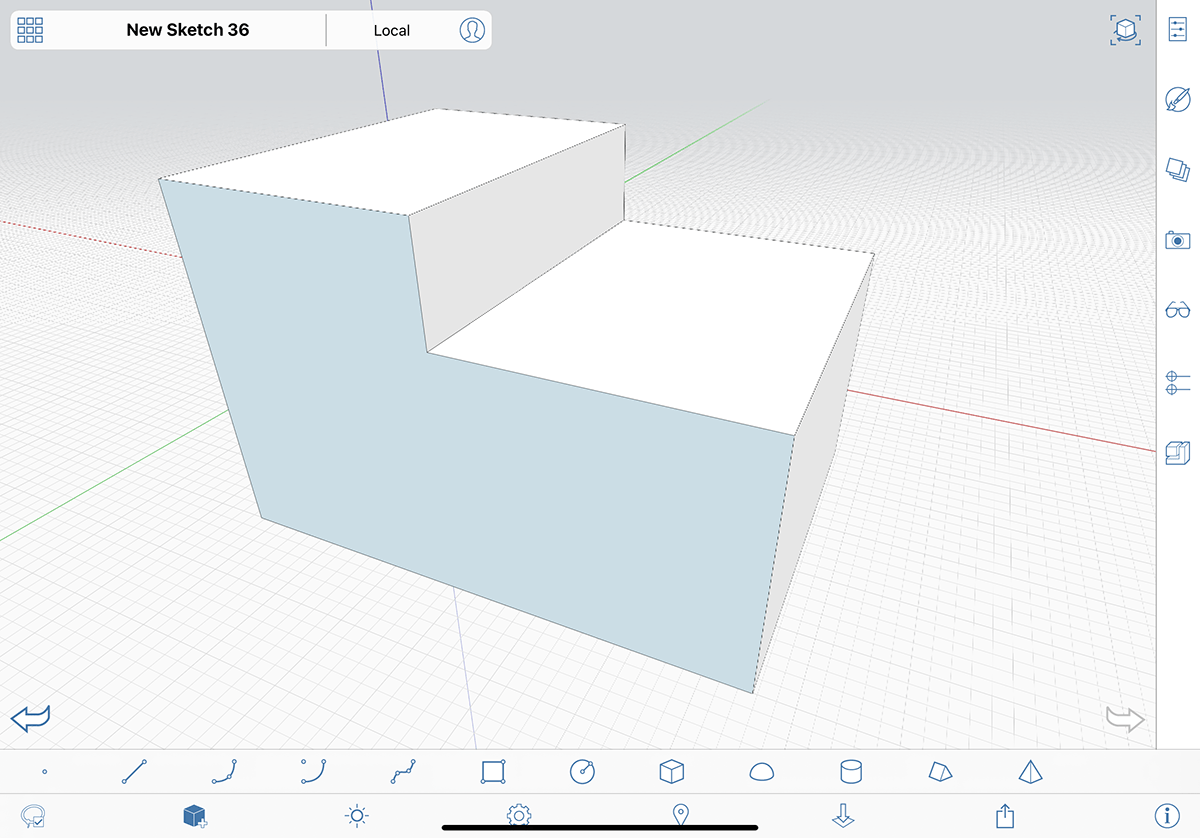
Now, let’s do it again, but this time after you extrude the first cube, make sure all of it is selected and hold your finger down on the grey circle till you see the Context Menu. Choose the Create Group tool. You’ll notice it all turns blue and there is an outline surrounding the whole thing. Deselect it and make the second cube and make a group of it. So now each building is its own group.

You’ll also notice that it takes only one touch to select a group. If you tap a group twice you enter the Edit Group interface and now you can make any changes to the group without it affecting anything else.
Make Copies (Duplicates). Copy and Paste
This was a bit frustrating and made me feel kind of like an idiot. I’ve been creating illustrations on computers for 36 years and back in those days if you wanted a duplicate of an object you had to use copy and paste. (I can’t believe I said that... “Back in my day, sonny,” like we had to build our own computers by hand.)
But someone came up with the great idea of just holding down a modifier key and dragging and there was the new copy of the object. It felt miraculous! Eventually it became automatic, my left hand hovering over the control keys like my feet over the clutch when driving (wait, I did it again... “Back in my day cars had three pedals on the floor).
So, the thing that’s embarrassing are the number of hours I spent trying to make a duplicate of an object. Since you can’t use modifier keys on the iPad you just have to go back to the old way of making a copy and pasting.* To make a duplicate of an object make sure the object/group is selected and choose Copy from the Context Menu. Then tap the screen somewhere to deselect. Finally, touch and hold somewhere on the screen and choose Paste from the Context Menu. Ta-da!
*Actually Adobe Illustrator figured a way to use finger gestures on the iPad to accomplish the option/drag/duplicate process. That’s what took me so long, trying different variations of that in FormIt, grrr.
Layers
The last thing that will help you setting up your scenes is learn to use Layers.
For my 4-block Bowery neighborhood scene I made one layer for each of the blocks, and one layer for all the sidewalks.
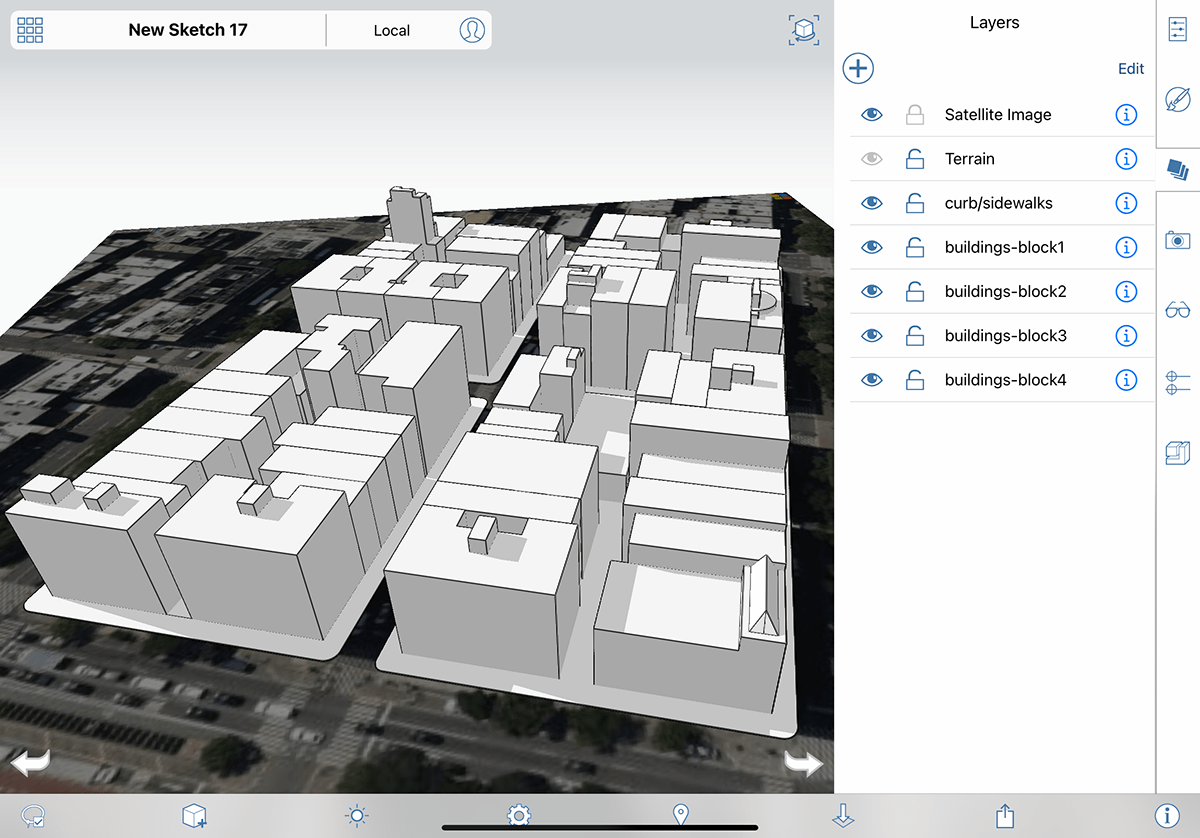
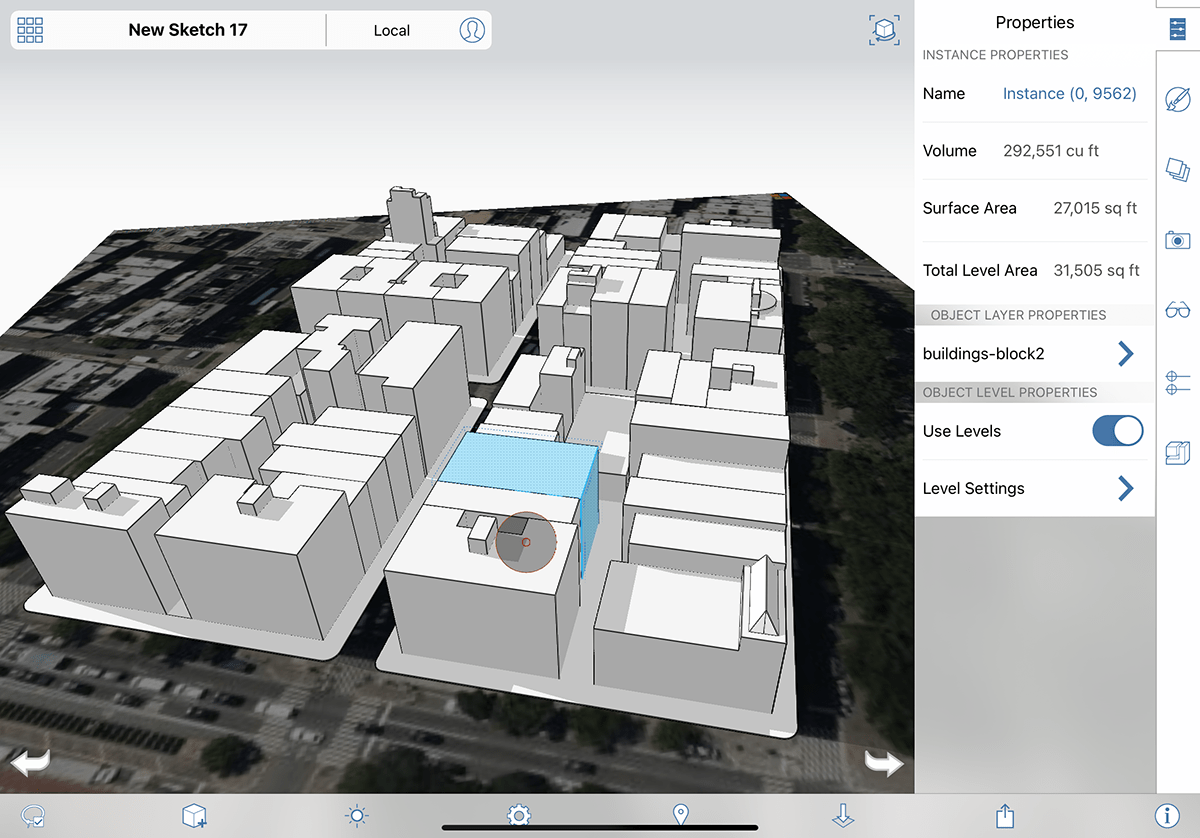
You’ll need to think your scene through and decide which layers you want. You need to create them first, then tell FormIt to place objects on the layers using the Properties panel.
Closing Thoughts
FormIt let’s you dip your toes into 3D modeling without it being too overwhelming.
I use it as a step in my process. Anything you can do to shorten the distance between what you see in your mind and what you want in your final illustration is a good thing.
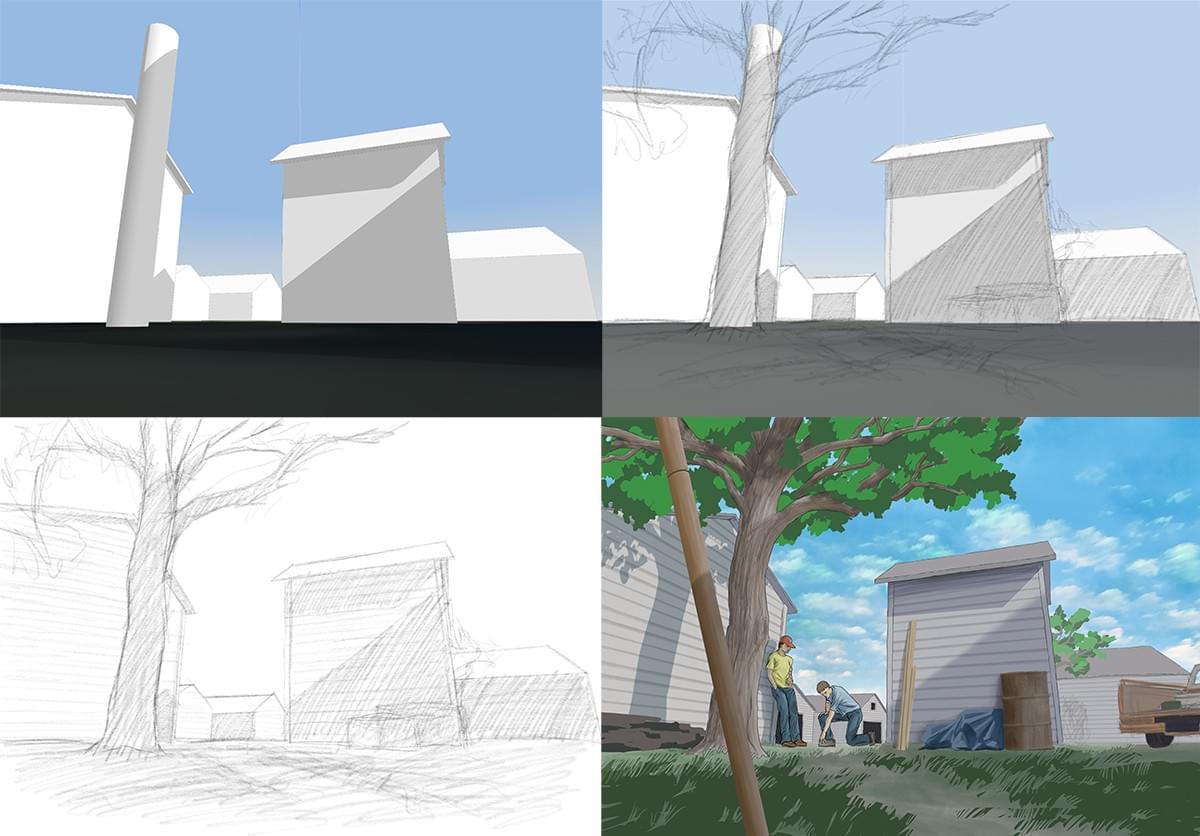
And besides, FormIt is just plain fun to use. There’s something satisfying about pulling up those rectangles into cubes and massing buildings and moving the shadows. Maybe it’s just simple pleasures for a simple mind but I love it.
Your support keeps me going, I couldn't do it without you!


